
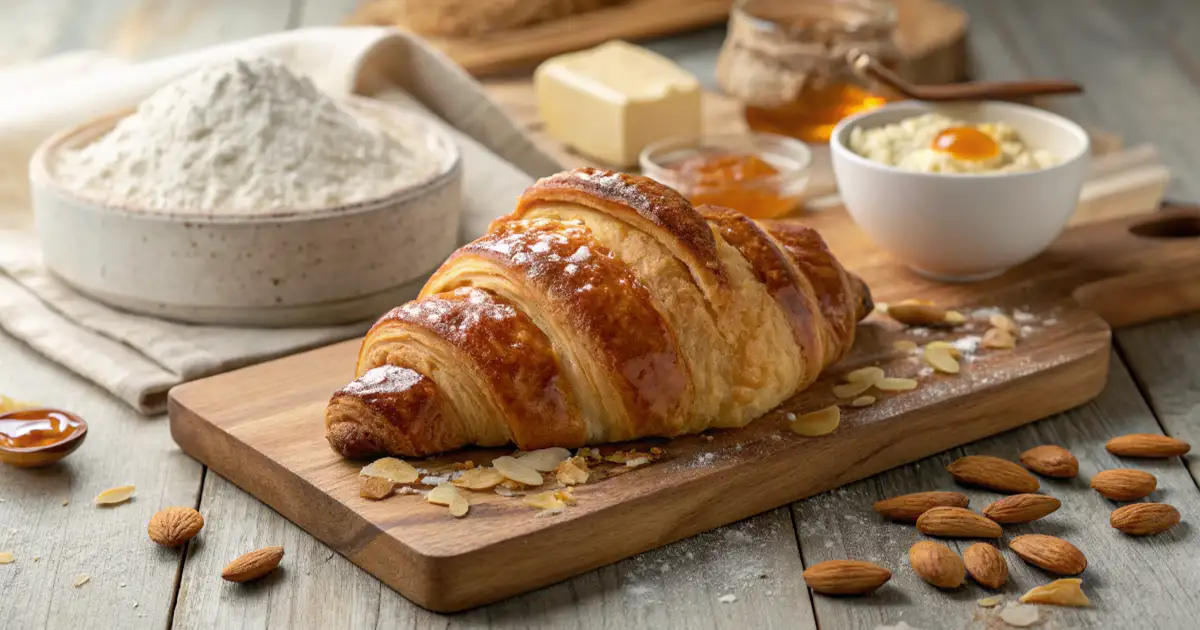
A proper gipfeli recipe delivers buttery layers that melt in your mouth, complete with that delicate, crisp crust. The secret lies in careful dough preparation, thoughtful lamination, and patient resting times. Once mastered, you’ll have a standout Swiss treat perfect for any breakfast or brunch.

Table of Contents
Introduction
If you’ve ever strolled through a Swiss bakery in the early morning, you’ve likely been greeted by the warm aroma of freshly baked delights. One star of the show is the gipfeli recipe, the Swiss cousin to the French croissant. You get the same irresistible flaky layers, but with a uniquely Swiss twist: a hint of sweetness, a slightly different shape, and a centuries-long tradition woven into every golden, crescent-shaped bite.
There’s a rich cultural legacy behind the gipfeli recipe. In Switzerland, families and friends often gather around the breakfast table to enjoy this pastry with jam, butter, or even cheese, making the morning meal a cozy, sociable affair. The dough, patiently made and skillfully folded, embodies the Swiss ethos of precision and careful craftsmanship.
In the sections that follow, you’ll discover everything needed to master the gipfeli recipe in your own kitchen. We’ll talk about choosing the right ingredients, perfecting the lamination technique, shaping the dough into its signature crescent form, and baking it to golden perfection. We’ll also dive into the pastry’s history and share tips from our own experiences—along with references to credible culinary authorities—so you can feel confident rolling, folding, and baking your way to a flawless batch of homemade Swiss gipfeli.
This article is for informational purposes only and does not replace professional veterinary advice.
A Brief History and Cultural Significance of the Gipfeli Recipe
Every bite of a freshly baked gipfeli is steeped in Switzerland’s proud baking tradition. While the French croissant might be the global icon of layered pastries, the Swiss have long held onto their own variation, known far and wide as the gipfeli recipe, which goes back to at least the 19th century. Locals often point to the close ties between Swiss and Austrian baking influences, referencing how the kipferl (another crescent-shaped pastry) found its way through cultural exchanges into Swiss bakeries.
According to Switzerland Tourism’s official insights on local pastries, the Swiss put their distinct spin on the traditional croissant formula by introducing slightly different fermentation and lamination steps. Over time, Swiss bakers refined the dough to be a tad less sweet or, in some cases, subtly sweetened, giving the pastry a characteristic taste that sets it apart. Even the shape can differ—Swiss gipfeli often appear a bit “fatter” in the middle and narrower at the ends, emphasizing the pastry’s unique identity.
Beyond mere taste, the gipfeli recipe also represents a cherished Swiss morning routine. Whether in bustling city cafés or quiet mountain villages, people gather for their coffee, orange juice, and the comforting presence of a warm gipfeli. The pastry’s popularity is so pervasive that it’s no surprise Swiss supermarkets stock freshly baked or even par-baked versions. But nothing compares to the satisfaction of preparing a homemade batch, where you’re fully in control of the dough’s flavor and texture.
When you bake your own gipfeli recipe at home, you’re not just recreating a pastry; you’re celebrating the warmth, precision, and convivial spirit of Swiss culture. You’re also immersing yourself in a process that fosters patience, skill development, and a hands-on appreciation for traditional baking methods.
Ingredients That Make or Break Your Gipfeli Recipe
To create the perfect gipfeli recipe, your ingredient choices and preparation methods are crucial. Let’s break down each element:
- Flour
- Choose a strong bread flour for elasticity and gluten development, which promotes better layering.
- Some home bakers blend cake flour and bread flour for a tender crumb, but a pure bread flour is typically recommended for a more structured dough.
- Butter
- Butter is the soul of the gipfeli recipe. High-quality, high-fat European-style butter contains less water, yielding flakier layers.
- Keep your butter cold for optimal lamination and to prevent it from melting prematurely.
- Yeast
- Traditional Swiss gipfeli recipe versions rely on active dry yeast or fresh yeast for a controlled rise.
- Always activate your yeast correctly (check temperature and resting times) so the dough can develop flavor and body without rushing.
- Milk or Water
- Many traditional versions use a blend of milk and water, but the ratio can vary by preference.
- Milk adds richness, a subtle sweetness, and helps with browning. Water lightens the dough if you prefer something less dense.
- Sugar and Salt
- The amount of sugar is often less than in a French croissant, giving the pastry its distinct Swiss note.
- Salt balances sweetness and deepens flavor; always measure precisely to avoid dull or overwhelmingly salty results.
- Egg Wash
- An egg wash (egg + a splash of milk or water) brushed on top before baking is key for color and shine.
- Try not to let the egg wash drip onto the edges, as it can seal layers and affect the pastry’s rise.
These ingredients may seem simple, but how you combine and handle them can significantly affect your final product. In making your gipfeli recipe, remember that quality, temperature control, and precise measurements translate directly into those tender yet crisp flakes we all crave.
The Art and Science Behind Dough and Lamination
Why Lamination Matters
Lamination is what transforms a simple yeasted dough into an airy, layered masterpiece. You enclose a slab of cold butter in dough, then fold and roll it multiple times. During baking, trapped steam from the butter pushes the dough’s layers apart, creating that light, flaky texture. Even though it seems intimidating, learning lamination for your gipfeli recipe can be wonderfully meditative once you get the rhythm.
The Role of Gluten Development
Before you move to lamination, you want some gluten development—strong enough to hold those buttery layers yet flexible enough for repeated rolling. An overworked dough can become too elastic, shrinking back as you roll it out. An underworked dough can tear easily. Kneading to just the right point ensures the dough is smooth, bouncy, and ready for butter folding.
Temperature Control
If there’s a single golden rule for a flawless gipfeli recipe, it’s “keep it cold.” Warm dough leads to melting butter, resulting in soggy layers that merge rather than separate. After each folding session, rest your dough in the refrigerator. This relaxes gluten and re-chills the butter, so each roll-and-fold step yields distinct, uniform layers.
Resting and Proofing Times
Time is your friend in a gipfeli recipe. After laminating, the dough often needs to rest again—sometimes overnight, sometimes for several hours. Slowing down the fermentation allows complex flavors to develop, reminiscent of a sourdough’s complexity but in a milder form. A long, cold proof in the fridge also tightens the dough, making the final shaping much easier.
Embracing these scientific fundamentals will help you produce a more reliably successful gipfeli recipe. The interplay of gluten structure, butter layers, and proper temperature management sets you on the path to a pastry that’s airy, flaky, and downright irresistible.
Step-by-Step Guide to Making a Classic Gipfeli Recipe
In this section, we’ll walk you through the full process. Feel free to adapt these steps based on your own kitchen conditions, but remember that each technique is time-tested to preserve that essential Swiss character.
1. Prepare the Dough
- Activate the Yeast:
- In a small bowl, combine ¼ cup of warm water (around 100°F) with 1 tablespoon of sugar.
- Sprinkle in 2¼ teaspoons of active dry yeast. Stir gently, then let the mixture sit for 5–10 minutes until it becomes frothy.
- Combine Wet Ingredients:
- In a separate bowl, whisk together 1 cup of cold milk and 1 tablespoon of melted (but not hot) butter.
- This will moderate the temperature so your dough isn’t too warm.
- Mix Dry Ingredients:
- In a large mixing bowl, combine 3½ cups of bread flour, 2 tablespoons of sugar, and 1½ teaspoons of salt.
- Form a small well in the center.
- Bring the Dough Together:
- Pour in the activated yeast mixture and the milk-butter mixture.
- Stir gently until a shaggy mass forms, then knead the dough on a floured surface for about 5–7 minutes. Aim for a smooth, slightly elastic ball.
- Initial Rest:
- Shape the dough into a ball, place it in a lightly greased bowl, and cover with plastic wrap.
- Let it rest in the fridge for at least 4 hours, or overnight if possible.
Why This Matters: Cold fermentation deepens flavor and makes the dough easier to handle in the next steps of the gipfeli recipe.
2. Laminate the Dough
- Prepare the Butter Block:
- Take 1½ sticks of cold European-style butter and pound it or press it between parchment sheets into a rectangular slab about 6 x 8 inches.
- Keep the butter cold but pliable.
- Roll Out the Dough:
- Roll your dough into a rectangle roughly 10 x 16 inches.
- Place the butter slab in the center, leaving room around the edges so you can fold the dough over it.
- Fold and Seal:
- Fold the dough edges over the butter so it’s completely enclosed.
- Use your rolling pin to gently press down, starting from the center outward, to distribute the butter evenly.
- First Fold:
- Roll the dough-and-butter package into a long rectangle, about 8 x 20 inches.
- Fold the dough in thirds, like folding a letter. This is your first “turn.”
- Chill and Repeat:
- Wrap the dough in plastic and refrigerate for 30–60 minutes.
- Take it out, rotate 90 degrees, roll it back into an 8 x 20-inch rectangle, and fold in thirds again. Repeat this for a total of 3 or 4 turns, chilling the dough between folds.
- Overnight Rest:
- After your final fold, wrap the dough and let it rest in the fridge overnight. This long rest is key for flavor and texture.
3. Shape the Gipfeli
- Divide and Roll:
- Take the chilled dough and roll it into a large rectangle, about ¼-inch thick.
- Trim the edges for a neat rectangle, then cut into triangles. Each triangle should be about 4–5 inches at the base and 7–8 inches tall.
- Form the Crescent:
- Starting from the wide base, roll each triangle toward the tip.
- Gently curve the ends to create a crescent shape. Place them on a baking sheet lined with parchment, tip side down so they don’t unroll.
- Second Proof:
- Lightly cover the shaped pastries with a clean cloth or plastic wrap.
- Let them proof in a warm place (75–80°F) until slightly puffy, usually 1–2 hours. They shouldn’t double, just become soft to the touch.
4. Egg Wash and Bake
- Preheat the Oven:
- Set your oven to 375°F (190°C).
- Egg Wash:
- Whisk 1 egg with 1 tablespoon of milk.
- Gently brush each pastry, avoiding the edges.
- Bake:
- Bake for 15–20 minutes or until the pastries are golden brown.
- Rotate the trays halfway through to promote even browning.
- Cool and Serve:
- Let your freshly baked gipfeli cool on a rack for at least 10 minutes.
- Serve warm or at room temperature with your favorite jam, butter, or chocolate spread.
Once you’ve mastered this sequence, you’ll have a reliable gipfeli recipe you can adapt to personal tastes—adding sweet fillings, savory toppings, or even experimenting with alternate flours. But the essential techniques of lamination, shaping, and mindful proofing remain at the core.
Common Pitfalls (and How to Avoid Them)
- Melting Butter
- Problem: Butter leaks out or absorbs into the dough.
- Fix: Always keep your dough and butter cold. Refrigerate if you sense the dough warming up too quickly.
- Tough Dough
- Problem: Excessive gluten development leads to a chewy pastry.
- Fix: Knead only until the dough is smooth. Excessive kneading creates toughness, making your gipfeli recipe less flaky.
- Flat, Dense Pastries
- Problem: Over-proofing or under-proofing can cause the pastry to collapse or fail to rise properly.
- Fix: Use the fingertip test: gently press a corner of the dough. If it springs back slowly, it’s ready; if it deflates entirely or the indentation remains, adjust proofing times.
- Not Enough Layers
- Problem: Pastries bake up more like rolls than laminated dough.
- Fix: Ensure you complete all your folds (3 to 4 times) and keep the butter distribution even. Skipping folds or rushing lamination prevents the creation of distinct layers.
- Uneven Baking
- Problem: Parts of the pastry remain undercooked while others are too dark.
- Fix: Place the pastries in the center of your oven and rotate your baking sheet halfway through. An oven thermometer can help ensure a consistent 375°F.
By sidestepping these pitfalls, you’ll protect all the hard work you’ve invested in your gipfeli recipe. Baking can be a dance between timing, temperature, and technique, but with these tips, you’ll soon find your rhythm.

Serving Suggestions and Variations
The classic gipfeli recipe is wonderful on its own, but you can expand your repertoire with some creative twists:
- Sweet Additions:
Fill the croissant-like pastry with nutella, pastry cream, or even a fruit preserve before rolling. Top with a light dusting of powdered sugar after baking. - Chocolate Drizzle:
For a show-stopping finish, melt some high-quality chocolate and drizzle it over the cooled pastries. Perfect for special occasions or dessert platters. - Almond Gipfeli:
Inspired by almond croissants, you can incorporate almond flour in the dough or fill your shaped pastries with almond paste. Top with sliced almonds for extra crunch.
Whichever variation you pick, remember to keep the core principles of the gipfeli recipe intact: quality ingredients, patient lamination, and careful attention to temperature and proofing times. That foundation ensures your pastry always turns out layered, light, and bursting with flavor.
FAQs
Below are some frequently asked questions related to the gipfeli recipe. Each question is presented twice: once in a concise form, and once reworded with the same meaning. Answers are provided in three sentences, each under 300 characters, and each contains the focus keyword “gipfeli recipe.”
1) What’s the best way to make a traditional gipfeli recipe?
For a perfect traditional gipfeli recipe, start with high-quality butter and cold fermentation. Layer the dough with care, giving enough rest between folds. This patient process keeps each gipfeli recipe flaky and beautifully golden.
2) How do I prepare a simple gipfeli recipe for beginners?
A simple gipfeli recipe involves fewer folds and a shorter rest time. Use readily available bread flour and follow standard yeast activation. Each step is still key for that authentic gipfeli recipe taste.
3) Does BBC have a reliable gipfeli recipe to follow?
Yes, BBC often provides comprehensive pastry guides similar to a swiss gipfeli recipe. They typically focus on straightforward tips for lamination and proofing. Adapting a BBC croissant technique can yield a solid gipfeli recipe base.
4) Which easy croissant recipe can I convert into a gipfeli recipe?
Yes, most basic croissant techniques adapt well into a gipfeli recipe. Slightly reduce sugar and adjust folding times for a Swiss twist. This ensures each pastry honors the essence of a real gipfeli recipe.
5) How do I create a professional croissant recipe at home similar to a gipfeli recipe?
To match a bakery standard, focus on precise folds, high-fat butter, and cooler temperatures—key components of a top-tier gipfeli recipe. Let the dough rest overnight for complex flavor. Shaping and proofing precisely also elevate the final gipfeli recipe result.
6) Is there a way to make an easy croissant recipe without yeast, similar to a gipfeli recipe?
You can try a no-yeast puff pastry alternative, but it differs from a classic gipfeli recipe. Traditional yeast adds depth and texture. Still, a yeast-free dough offers a quicker path if you crave layers without long proofs for your gipfeli recipe fix.
7) What’s the best approach for an easy gipfeli recipe that still tastes authentic?
Minimize folds but retain quality butter and proper chill times in your gipfeli recipe. Even short rests let gluten relax and preserve the flaky layers. Staying true to Swiss tradition maintains that classic gipfeli recipe flavor.
8) How can I ensure my homemade gipfeli recipe is the best possible?
Focus on consistent temperatures, quality butter, and patient folding for your homemade gipfeli recipe. Avoid rushing proofs, and handle the dough gently. These details unify to elevate each layer of your gipfeli recipe.
Conclusion
From the first stir of flour and yeast to the tantalizing aroma wafting from your oven, the journey to a perfect gipfeli recipe is an enriching experience. You’ve explored the Swiss heritage that gave rise to this pastry, learned the specifics of lamination and proofing, and discovered how subtle variations in ingredient quality and temperature can make a world of difference. Now it’s your turn to put this knowledge into practice—whether you stick to the classic version or decide to add your own creative spin.
Feel free to share your results or any new flavor twists you invent. Baking is about community, experimentation, and the simple joy of breaking bread—especially if that bread happens to be an exquisitely flaky, buttery Swiss gipfeli. Happy baking!
Key Takeaways
- The gipfeli recipe relies on carefully laminated layers and cold fermentation.
- Quality ingredients, especially high-fat butter, maximize flavor and texture.
- Patience with folding, resting, and proofing leads to authentic Swiss-style results.
- Simple adjustments, like sweetness level or fillings, allow endless variation.
- Keeping everything properly chilled is the linchpin for a successful gipfeli recipe.
What Our Food Lovers Say
There are no reviews yet. Be the first one to write one.
1 thought on “gipfeli recipe: 7 Astonishing Secrets for Crisp Perfection”